Creating multimedia messages
1
Press
, and select
Message
>
Create
>
Multimedia
message
.
2
Write the recipient’s telephone number in the
To:
field.
Add a semicolon (;) to separate each recipient.
If the recipient is in your Contacts, tap
. Select the
recipient from the list and tap
Add
. Tap
Done
when you
have selected all recipients.
3
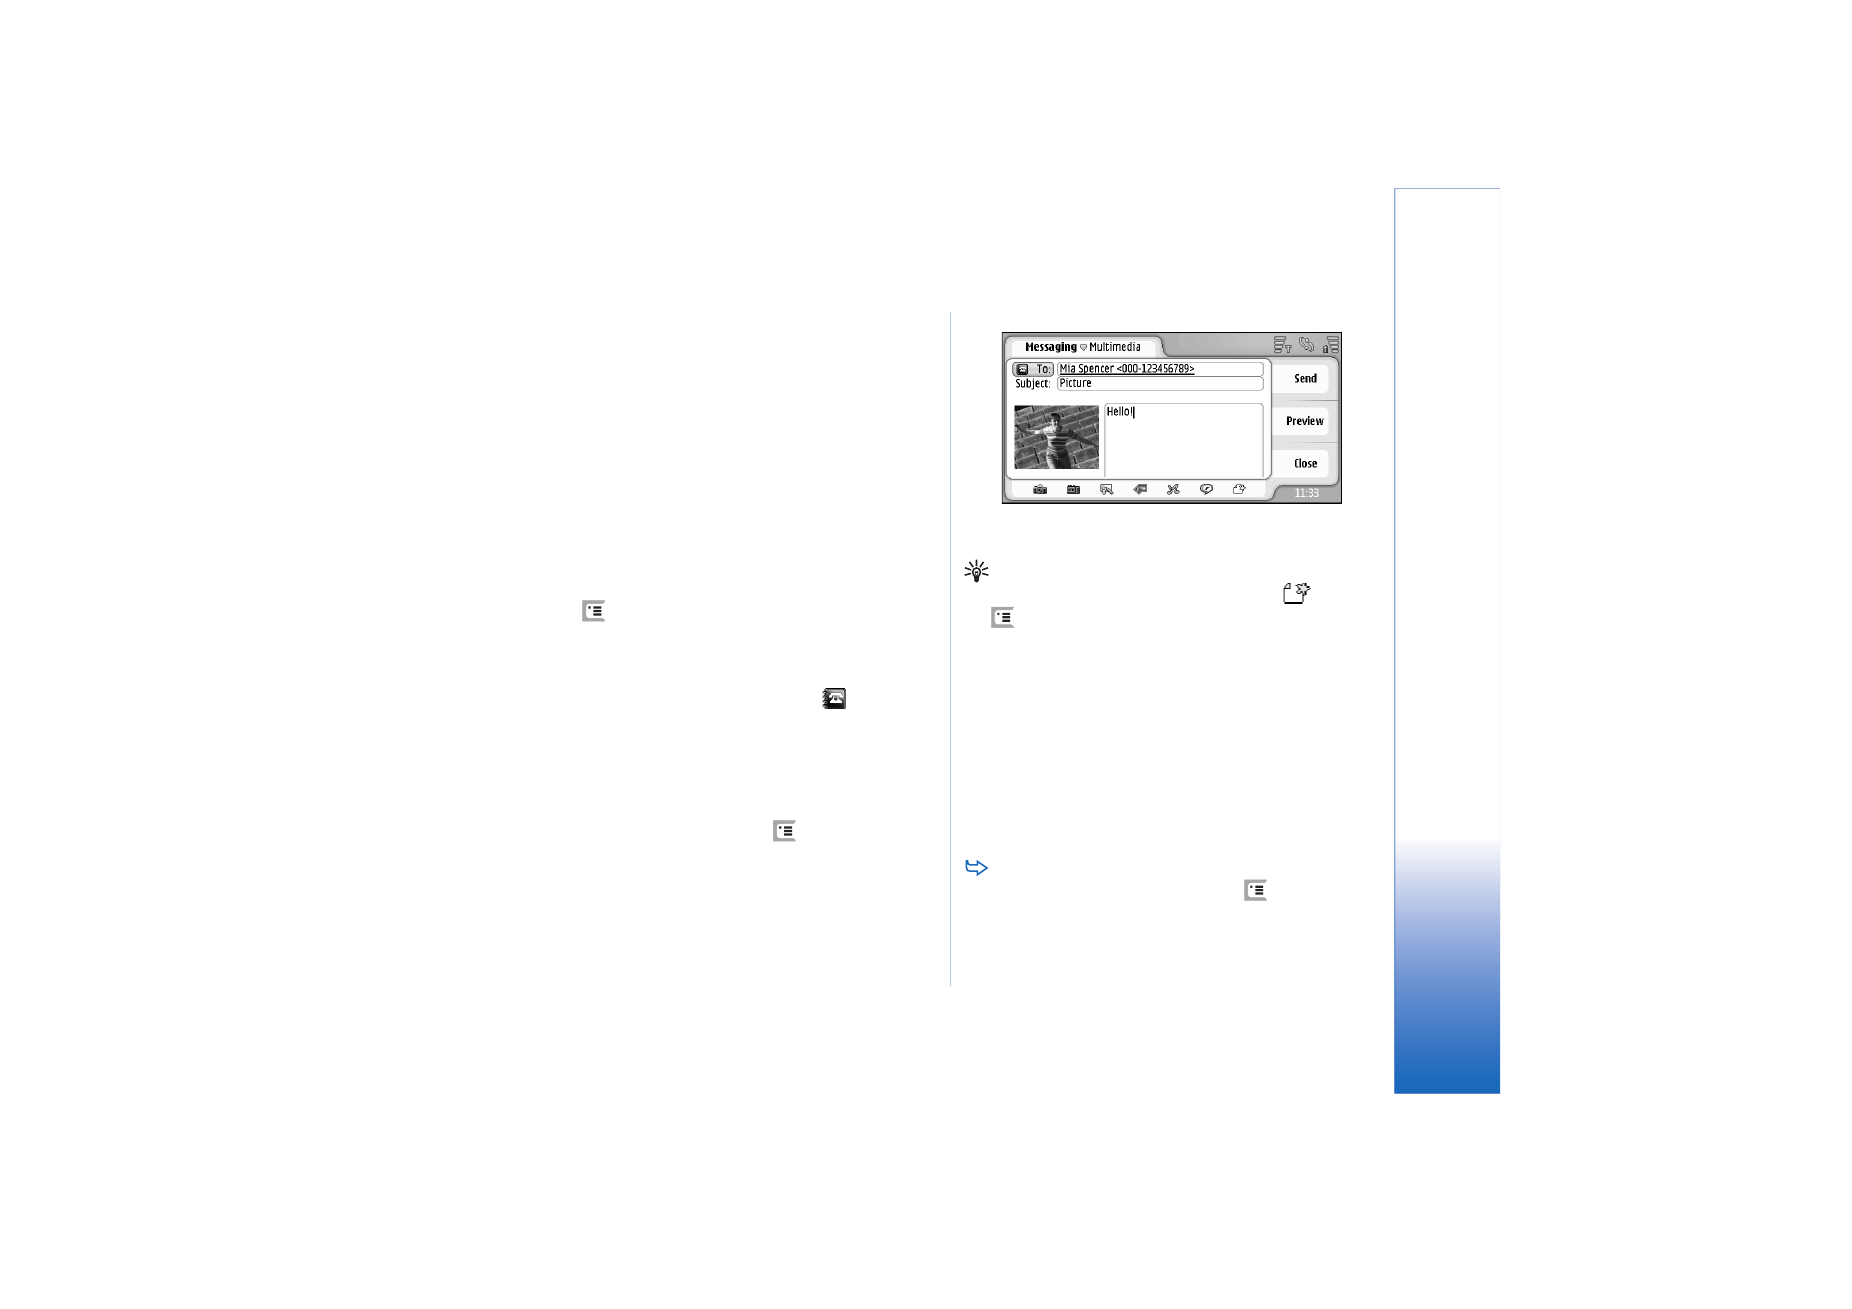
Write the message and add a media object. Use the
toolbar, or the menu command
Insert
to add images,
sound, or video to your message. See below for details.
If the toolbar is not visible, press
, and select
Display
>
Toolbar
.
4
When the message is ready, tap
Send
.
Fig. 18: Sending a multimedia message
Tip: A multimedia message may contain several
pages. To add pages, tap the toolbar icon
, or press
, and select
Insert
>
Page break
. If the cursor is in
the
To:
,
Cc:
or
Subject:
field when you add a page, the
new page will become the first page of the message.
Otherwise, the new page is added after the page where
the cursor is. Note that each page can contain only
one video or one sound clip. You can, however, have in
one message several pages that contain a video or a
sound clip. The maximum size of a multimedia
message supported by your smartphone is 100 kB. To
limit the content of your messages, see MMS settings,
“General page” on page 58.
To insert an existing image, sound, or video to your
message, use the toolbar, or press
, and select
Insert
>
Image...
,
Track...
or
Media clip...
. Browse for the
item, and tap
Insert
to add it to the message. Note
that wireless network may limit the size of MMS

Messa
gi
ng
56
Copyright © 2005 Nokia. All rights reserved.
messages. If the inserted picture exceeds this limit, the
smartphone may make it smaller so that it can be sent
by MMS.
To create a new picture, drawing or voice clip for
your message, use the toolbar, or press
, and
select
Insert
>
New image/media clip...
,
New sketch...
or
Sound clip...
. The corresponding application opens. See
“Taking pictures” on page 73, “Editing images” on
page 78, or “Voice recorder” on page 89 for details. Tap
Insert
to add the item to message.
Note that if some of the menu items under
Tools
menu are
not available or you get an error message when trying to
insert a multimedia item, your settings may be too
restricted. See MMS settings, “General page” on page 58
for details.
To change the position of text in relation to an
image or video, select the text field, press
, and
select
Tools
>
Page layout
>
Place text on right
or
Place
text on left
. (Not available in
Restricted mode:
.)
To format text, select the text by dragging the stylus
over it, press
, and select
Tools
>
Format text...
. You
can also select the formatting first and then start
writing. (Not available in
Restricted mode:
.)
To change the background colour of a message,
press ,
and
select
Tools
>
Set background colour...
.
Tap the colour square and choose a new colour. (Not
available in
Restricted mode:
.)
To add effects to multimedia objects, select the
object, press
, and select
Tools
>
Transition settings...
.
You can specify how long an object is displayed and
how a new object is opened. (Not available in
Restricted
mode:
.)
The appearance of a multimedia message may vary
depending on the receiving device.
To delete a multimedia object from a message,
select the object, press
, and select
Edit
>
Delete
.
Select the appropriate command.
Tip: To add new pages to a multimedia message, press
and select
Insert
>
Page break
. If the cursor is in the
To:
,
Cc:
, or
Subject:
field when you add a page, the new
page becomes the first page of the message. Otherwise,
the new page is added after the page where the cursor
is located.
To delete a page, go to the page, press
, and select
Edit
>
Delete
>
Page
.
To specify sending options for the current message,
press
, and select
Tools
>
Sending options...
. Note
that any changes you make in this dialog affect only
the current message you are about to send. Define the
following:
Receive report:
- (network service) Select this, if you want
to receive a notification when the message has been
delivered to the multimedia messaging centre.

Messa
gi
ng
57
Copyright © 2005 Nokia. All rights reserved.
Message validity:
- (network service) If the recipient of a
message cannot be reached within the validity period,
the message is removed from the multimedia
messaging centre. Note that the network must support
this feature.
Maximum time
is the maximum amount of
time allowed by the network.
To preview the message before sending, press
, and
select
Message
>
Preview
.
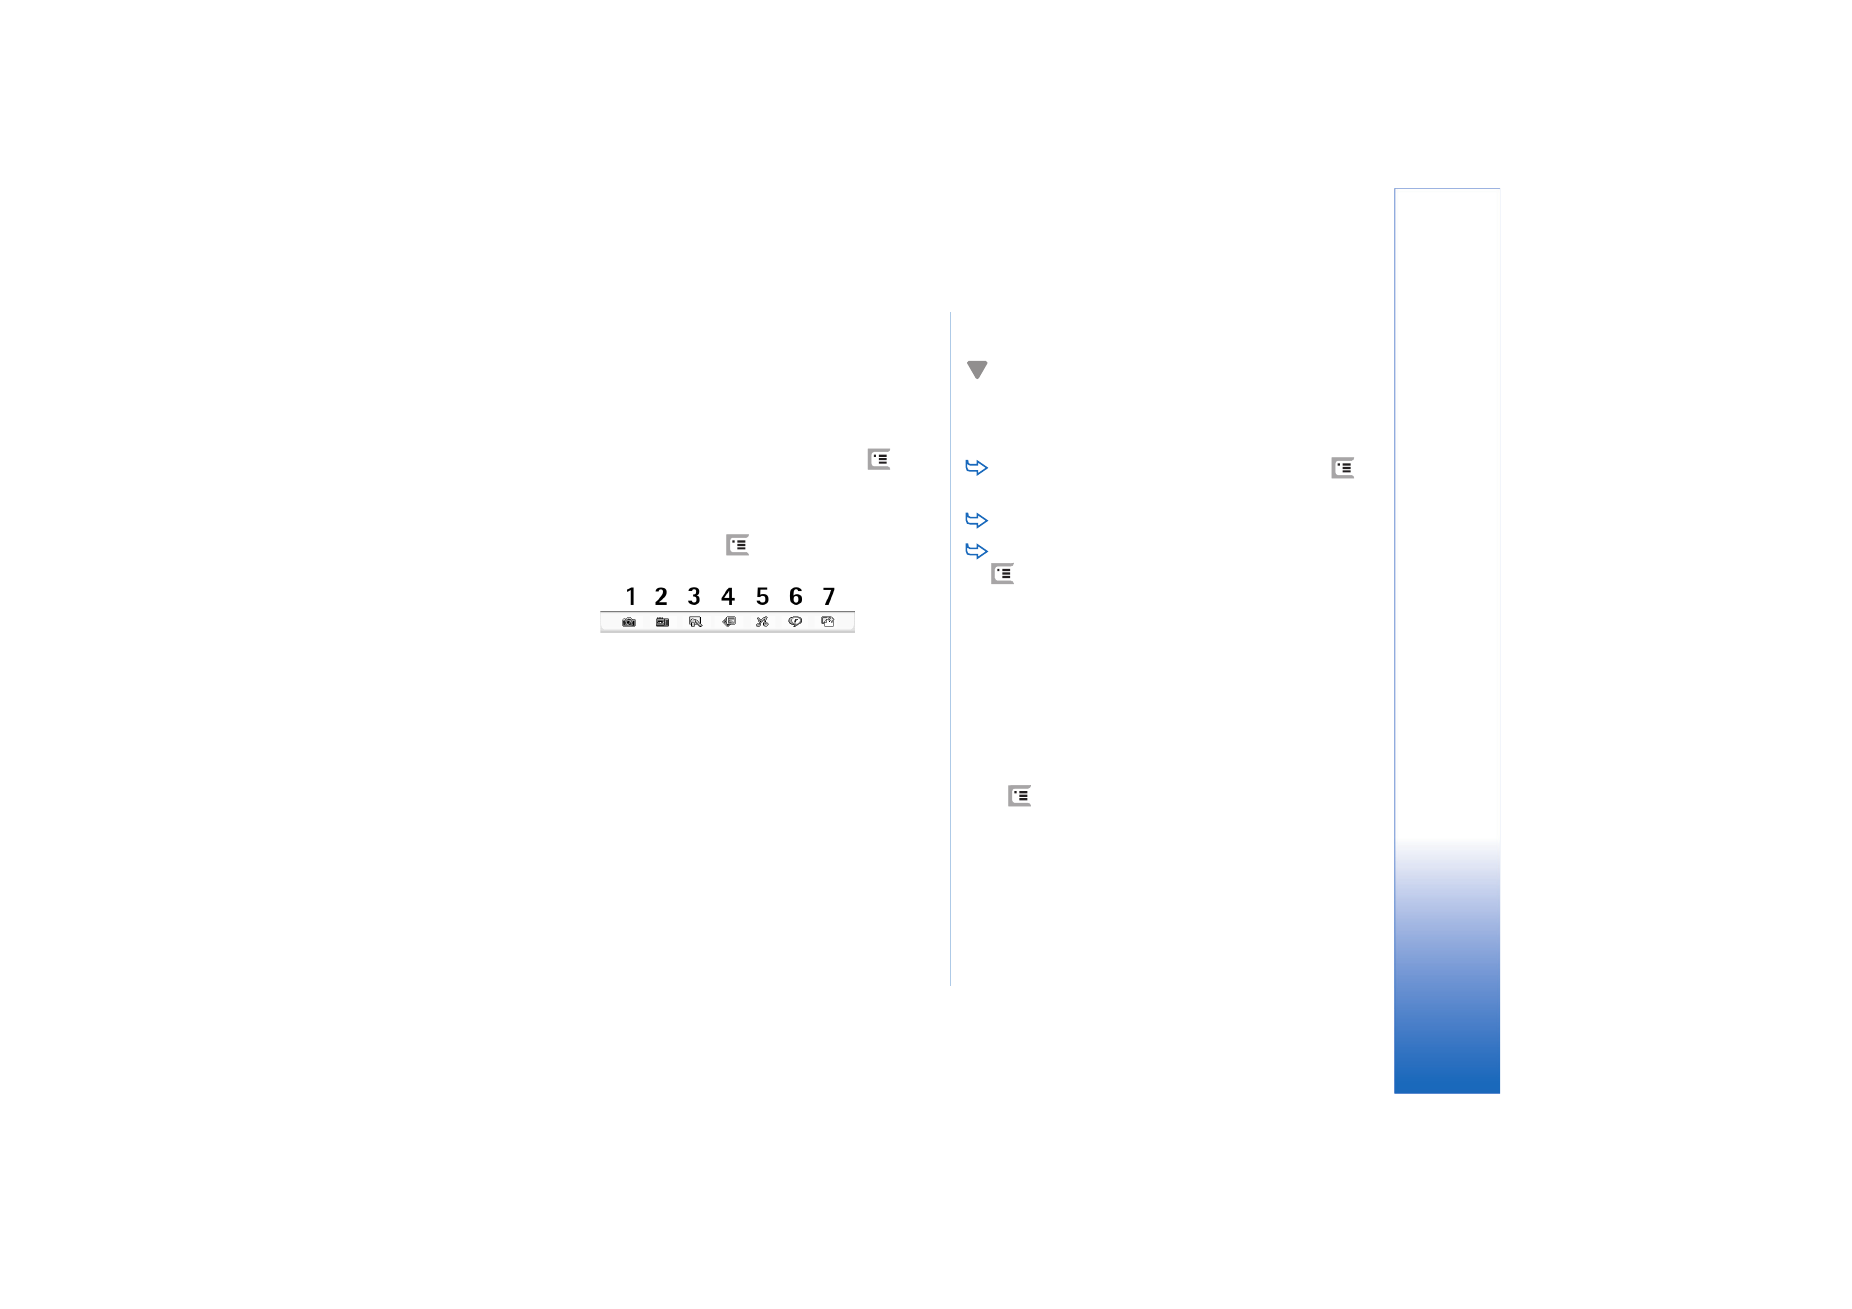
Toolbar
If toolbar is not visible press
, and select
Display
>
Toolbar
.
1
Take a picture or record video.
2
Record a sound clip or insert an existing sound clip.
3
Create a sketch image.
4
Insert an image.
5
Insert a music clip.
6
Insert a video clip.
7
Insert a page break.